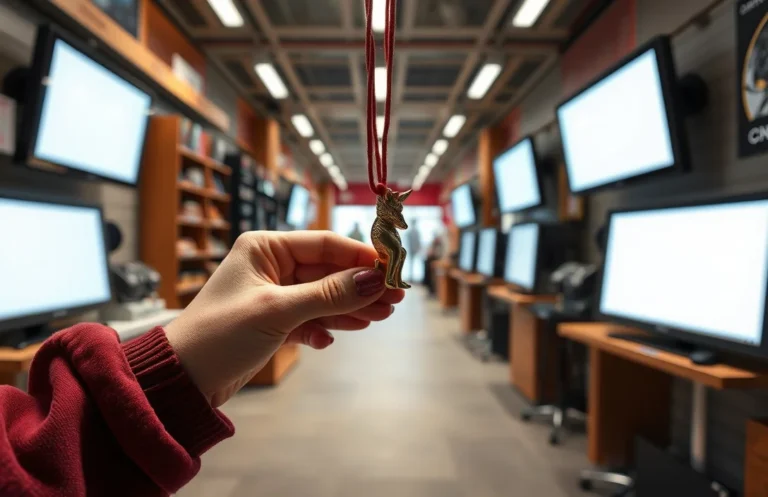
How To Put Charms On Shoes? 3 Methods For Easy Customization
Charms are a fast, personal way to upgrade everyday footwear. You’ll need the right combination of charms, a reliable surface, and a plan for how you want to wear them. Start with a simple, reversible setup and scale up to sew-ins or patches if you wear sneakers often. Gather your materials, pick a method, and test for comfort before you wear them out.
Attaching charms to sneakers offers a quick way to customize footwear. Use three reliable methods: lace-clip, glue-on, or sewing. Choose sizes from 4 mm to 12 mm for the right balance of visibility. Begin by cleaning surfaces, then apply the method suited to the shoe material and wear level.
Key Takeaways
- Start small. Begin with 4-8 mm charms for most sneakers to keep it balanced.
- Choose a method. Lace-clip, glue-on, or sewing each offers different durability and reversibility.
- Match material. Leather requires specific glues; canvas and fabric tolerate fabric adhesives better.
- Test wear. Wear lightly for a day to confirm comfort and stability before longer use.
- Plan for removal. Have a strategy for removing or replacing charms without damaging the shoe.
Types of Charms and Size Guidance
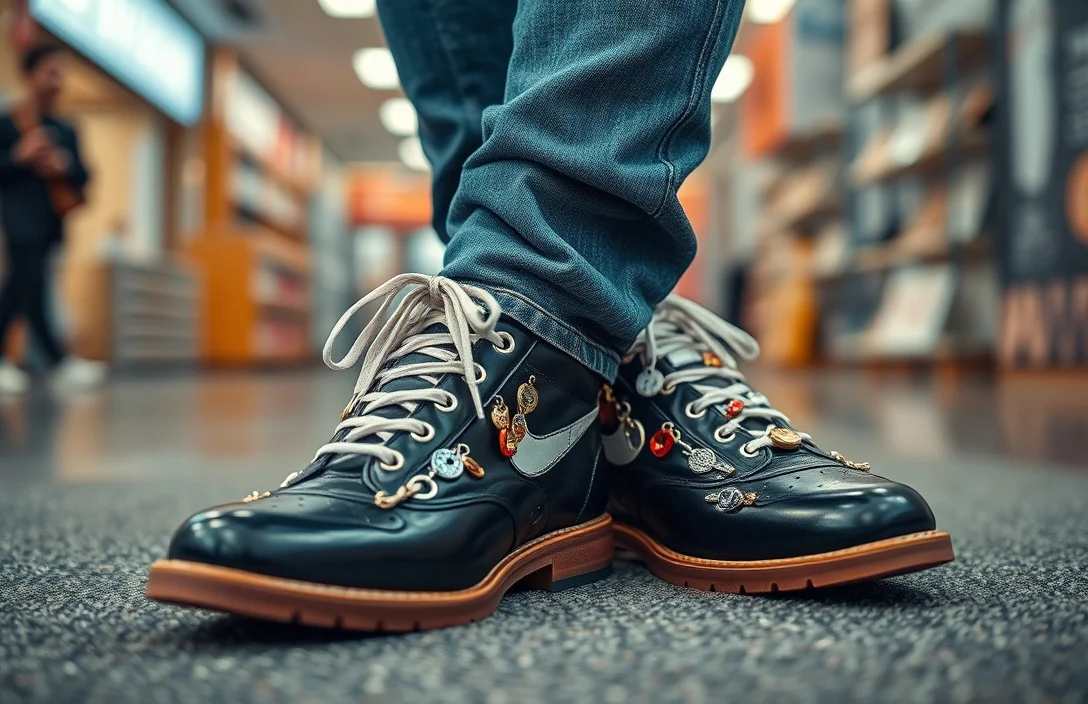
Charms come in several forms, each with a distinct look, attachment method, and wear profile. Lace beads thread onto the lace, clip-on charms grab the lace or eyelet, glue-on charms adhere to the shoe surface, and sew-in patches are stitched to fabric shoes. Size matters: 4-6 mm charms read as subtle accents; 8-12 mm charms make bold statements. For narrow laces or busy patterns, favor smaller sizes to avoid crowding.
Two factors influence your choice. First, consider how often you plan to switch charms. If you change looks weekly, start with reversible methods like lace clips or removable patches. For long wear with minimal maintenance, opt for glue-on or sewn patches. Second, think about the area of impact. The toe box or midfoot can tolerate larger charms better than the tip, where toes bend frequently. You’ll likely mix two or three types on a single pair.
| Charm Type | Best For | Typical Size Range | Pros | Cons |
|---|---|---|---|---|
| – | – | – | – | – |
| Lace Beads / Threaded Charms | Subtle, budget-friendly looks | 4-6 mm | inexpensive; easy to swap | can fray laces; may snag on socks |
| Lace Clips / Eyelet Clips | Reversible, quick changes | 6-12 mm | easy to remove; no glue needed | may slip if laces are slick |
| Glue-On Charms | Clean, low-profile on smooth surfaces | 4-12 mm | durable when cured; smooth finish | removal can damage surface; not ideal for frequent changes |
| Sew-In Patches | Heavy wear, durable look | 6-12 mm | very secure; best for daily wear | permanent; stitching may alter fabric feel |
| Patch Pendants with Loops | Fashion-forward, versatile | 4-10 mm | rotates with laces; easy repositioning | requires stitching or special hardware |
Start with a 6 mm lace-clip or glue-on charm to test fit on most sneakers. If you want a stronger hold on fabric, switch to a sew-in patch approach. For high-traffic days, durability from stitching is preferable to relying on glue alone.
Shoe Materials and Charm Compatibility
Shoe material dictates charm attachment and longevity. Leather accepts certain glues better when properly prepared, while canvas and fabric tolerate fabric glues and thread-based methods without as much risk of damage. Suede requires gentler adhesives and careful handling to avoid staining or wearing away the nap. Rubber soles should be treated with surface cleaners and a test patch if you plan any attachment near the sole edge.
Begin with a clean, dry surface. Remove dirt and oils with mild soap and water, then let the area dry completely before attaching anything. If you plan to switch methods, test a small area first to ensure no color transfer or adhesive residue. For leather, use leather-safe glues or a thin fabric patch under the charm to protect the finish. For canvas, many fabric glues perform well, but sewing or using a clip-on solution is usually best for busy laces.
Quick compatibility checklist:
- Leather: use specialized leather glue or a two-step epoxy; avoid water-heavy adhesives.
- Fabric and canvas: fabric glue or adhesive patches are effective; sewing adds long-term stability.
- Suede: use low-tack adhesives to preserve the nap and avoid aggressive solvents.
- Synthetic leather: many fabric glues are suitable; test on a small area first.
- Rubber soles: limit glue to upper areas away from flex zones; ensure no solvent damage.
Smaller charms typically flex less with shoe movement, reducing peeling risk. Larger charms require sturdy attachment and may alter how the shoe bends, especially on tight-knit stitches or flexible panels. If unsure, start with 6 mm charms on canvas sneakers and adjust in future updates.
Lace Attachment Techniques
Lace attachment is the most versatile and least invasive option for casual shoes. Decide whether you want a fixed or removable look. Then choose the lace area: near the bottom eyelets for visibility or closer to the midfoot for balance. The technique depends on the charm design and how much you plan to use the shoe.
- Prepare your materials.
- Plan the charm layout on the lace.
- Use a small crimp bead or bead cap to anchor the charm base.
- Thread the lace through the charm’s loop or bead hole.
- Tie a small knot to keep the charm in place and prevent slipping.
- Adjust alignment and secure with a second knot if needed.
- Check that the charm sits neatly and doesn’t snag socks.
- Repeat for additional charms.
Always work on a clean, flat surface. For a reversible setup, choose lace clips that slide over the lace without permanent modification. If you opt for thread-based integration, use a fine needle and color-matched thread to minimize visible stitching. The result should feel firm but not tight enough to restrict lace movement.
If you’re new to this, start with a single charm on one lace and test wear before duplicating the setup on the other shoe. This helps you gauge comfort, balance, and how the charm interacts with your typical walking motion.
Glue-On Charms for Sneakers
Glue-on charms provide a clean, fast attachment on leather, synthetic leather, and smooth fabric surfaces. The key is surface prep, choosing the right adhesive, and allowing full cure time before wearing the shoes. On leather, avoid water-based glues that may lift or wrinkle the finish; on fabric, flexible fabric-safe adhesives work best. Always test on a hidden patch first to confirm colorfastness and compatibility.
Step-by-step:
- Clean and dry the target area thoroughly.
- Lightly roughen a glossy surface with a fine abrasive if needed.
- Apply a thin, even layer of adhesive to the charm or shoe, following product instructions.
- Press the charm firmly onto the surface for 30-60 seconds.
- Wipe away excess glue and check alignment.
- Allow 12-24 hours of cure in a cool, dry place before wear.
- Inspect edges after initial wear; re-press any loose edges.
- If you must remove, apply a gentle solvent recommended by the glue manufacturer and work slowly.
Glue-on charms are best for flat, non-textured surfaces. If your shoe has a large, curved toe cap or heavy texture, consider a lace-based or sewn-in charm instead. For sneakers that see rain or sweat, choose a flexible, air-dry glue and avoid rigid epoxies that crack with movement.
Sewing Charms into Fabric Shoes
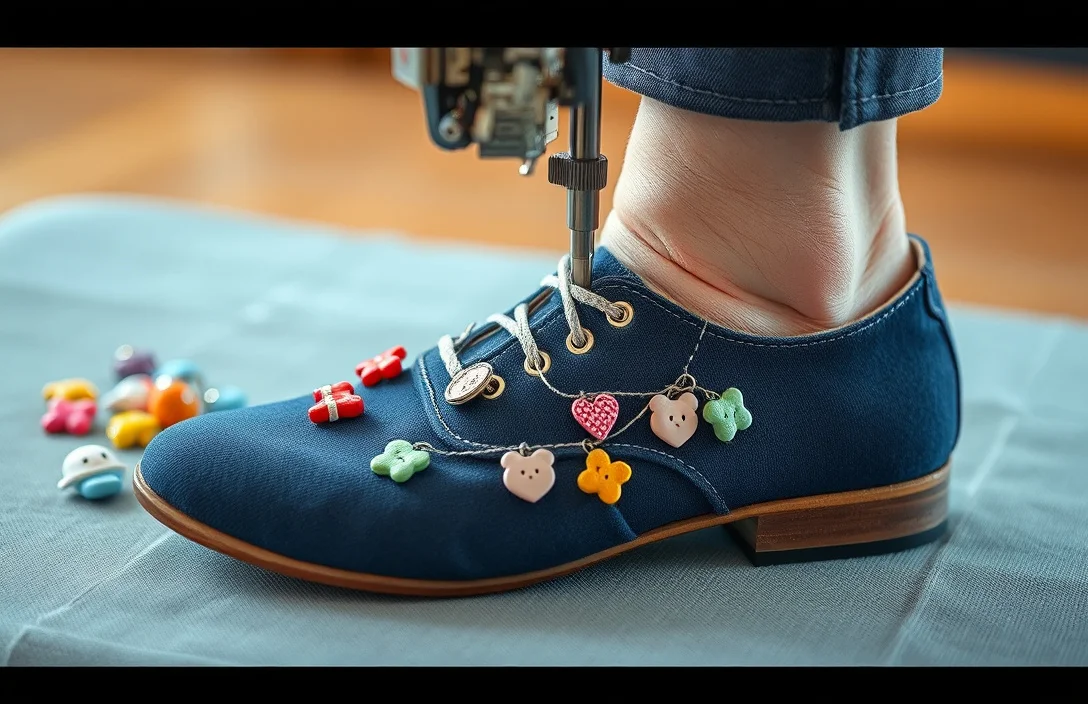
Sewing charms into fabric shoes creates the most durable attachment, ideal for everyday wear and for kids who run and jump a lot. You’ll need a strong thread color that matches the shoe, a sharp needle suitable for the fabric, and a clear plan for where each charm will anchor. Start with a simple stitch path and keep stitches small to minimize bulk and friction.
- Mark anchor points on the fabric where each charm will sit.
- Thread a sharp needle with sturdy embroidery or nylon thread.
- Start with a small stitch that goes through the charm’s loop or mounting hole.
- Secure with a tight knot on the inside and trim excess thread.
- Repeat for each charm, keeping spacing even.
- Finish with a final lock stitch and gently pull to test tension.
- Inspect for snag points; hide knots inside the fabric when possible.
- Wear the shoes to test comfort and adjust if needed.
Sewing works best when you choose patches designed for fabric wear and a thread that moves with the shoe’s flex. For thick or multi-layer uppers, stitch along hidden seams or under decorative patches to reduce bulk. For children’s shoes, use reinforced stitches to withstand frequent bending at the toe and midfoot.
Durability and Comfort Considerations
Durability is a practical test: how long your charms stay in place under real-world wear, wash cycles, and seasonal changes. Glue-on charms offer quick results, but longevity depends on surface texture and cure quality. Sewing adds strength but also permanently changes the fabric, affecting flexibility and breathability. Comfort hinges on how protruding a charm sits and whether it rubs against skin or socks.
A balanced setup shows the best results when mixing methods. Put durable sew-in patches on the sides of the shoe and reserve lace-based or clip-on charms for the lace area or tongue’s edge. Avoid heavy charms around the ankle bone or near high-motion zones where bounce and bending are frequent. When planning outfits, consider charm weight to ensure they do not pull on the laces or seams.
Best-practice notes:
- Keep the overall weight light to avoid altering gait or causing discomfort.
- Avoid placing charms on sole edges that flex with every step; use upper panels instead.
- Apply a protective sealant for fabric shoes if expecting rain or heavy wear to safeguard glue joints.
- Check charms monthly for looseness and re-tighten or replace as needed.
- Prepare a backup plan: have a spare charm ready for quick swaps if a charm breaks or loses color in the sun.
If you plan to wear sneakers daily, sewing or patches provide the best long-term results. For casual weekend wear, glue-on and lace attachments offer quick customization with minimal risk to the shoe’s original condition.
Practical verdict: glue-on and lace-based charms deliver fast, reversible customization for most sneakers, while sewing-in options provide the strongest, longest-lasting results. Start with 6 mm charms on canvas or leather surfaces and keep the attachment method consistent across both shoes. If a charm loosens, swap to a clip or re-secure with fresh stitching to maintain a tidy look.
Removing and Replacing Charms
Removing charms without damage is easier with the right method. For lace clips, slide the charm off the lace and store it. For glue-on charms, carefully remove the charm and be prepared to re-clean the surface or apply fresh glue to reattach. Sewing-based charms require cutting the thread with small scissors and cleaning remnants from the fabric.
1) Gently pry the charm loose using a plastic tool to avoid scratches. 2) If glue remains, use a safe adhesive remover or mild soap and water to soften and wipe away residue. 3) For sewn charms, snip the thread ends close to the fabric and pull through from the back. 4) Clean the surface again and let it dry fully before adding a new charm. 5) Reposition charms if needed and choose a different method for the new look. 6) Test wear to confirm there are no rub points or loose edges.
When replacing charms, consider wear patterns on the shoe. A charm that was once on the edge can shift inward after weeks of use, so recheck spacing after the first week. If reusing the same hardware, sanitize the pieces before reattachment to prevent color transfer or residue buildup.
FAQ
How many attachment methods are there for charms on shoes?
Three main methods exist: lace-clip, glue-on, and sewing. Each offers distinct advantages in reversibility, durability, and ease of use, so choose based on your shoe material and how often you want to change the look.
How long should I let a glue-on charm cure before wearing the shoes?
Allow 12-24 hours of cure in a cool, dry place. This helps the adhesive reach full strength and reduces the chance of charm detachment during initial use.
Is it safe to glue charms onto leather sneakers?
Yes, with the right adhesive and surface prep. Use a leather-safe glue, apply a thin layer, and press firmly. Test a hidden spot first to avoid staining or damaging the finish.
What’s the best way to remove charms without damaging fabric?
Gently pry loose with a plastic tool and, if needed, use a safe adhesive remover or mild soap and water. For sewn charms, cut the thread ends cleanly and pull through from the inside to minimize fraying.
Should I sew charms for high-activity shoes?
Yes, sewing provides the strongest hold for daily wear. If you expect frequent heavy movement, stitched patches are the most durable choice, even though they are permanent.
- How Do Shoe Charms Work? Explained Simply - June 24, 2026
- How To Install Jibbitz Shoe Charms? - June 24, 2026
- Personalization Ideas For Sneaker Charms - June 24, 2026